Tuesday, June 17, 2014

A Sailor Dress for Vacation Bible School

I adore all things nautical, but it can so easily veer into kitsch and irony because I've got no legitimate claim on seagoing gear.  My husband and I have been discussing what it means to wear clothes ironically because one of our friends told him he saw me around town in my 50s housewife dress.  Due to the way guys miss clothing details, I'm not even sure what dress he was referring to (related, as I went to market this morning, a random man muttered "nice dress" as he walked by - Genevieve wrinkled her nose "you're not wearing a dress!"  I was wearing a skirt and tank top.  Honestly. Men.). After a bunch of fascinating discussions with my husband, I think I figured out that I don't wear my clothes ironically (the opposite meaning of their original intent).  I'm not a hipster wearing vintage.  If I wear old styles, it's because I think the style is lovely as it was originally intended.  However, I don't dress in a period costume - meaning, I wear my modern sandals with my vintage dress and I'm not going to wear a hat or carry a little matching purse.

So when I started planning this dress for Genevieve, I wanted to simply reference the nautical colors.  Everything came from my stash and as far as I recall, it was all passed on to me free.  I borrowed the pattern from Rebecca.


I love how the sailor dress turned out, although I confess that collar gave me fits and lots of seam ripping.  I used a poly-cotton blend for the collar which does make it lay nicely.  The dress body is a vintage seersucker plaid.  It has no closures, only a detachable dickey.

Underneath are white bloomers with red hem stitching, made from a knit polo shirt of Daddy's (the one that came out of the closet with a moth hole).  By carefully lining up the pattern, I used the shirt hem as the bloomers hem.


Genevieve wasn't totally thrilled with the dress - I think we'll be collaborating more from now on - but she was pleased with all the compliments she got and she also suggested the red ric-rac to tie back her hair.

She's not objecting to wearing the dress to vacation Bible school with sandals.  She's carrying my great-aunt's Bible in its flowered case stuffed with pens, highlighters, and paper - all her own idea and so quaintly old-ladyish.

Sunday, June 15, 2014

I Love Wood Smoke

We went camping for the sake of the children.  They loved it.  The adults were charmed by their love, but rather overwhelmed by the amount of stuff camping requires as well as the relentless rain.  Lest you pity us, we were in a rough little cabin in a campground, not a tent in the wilderness.  There was running water nearby - lots of it in the stream, from the sky, and yes, importantly, in the bath house.

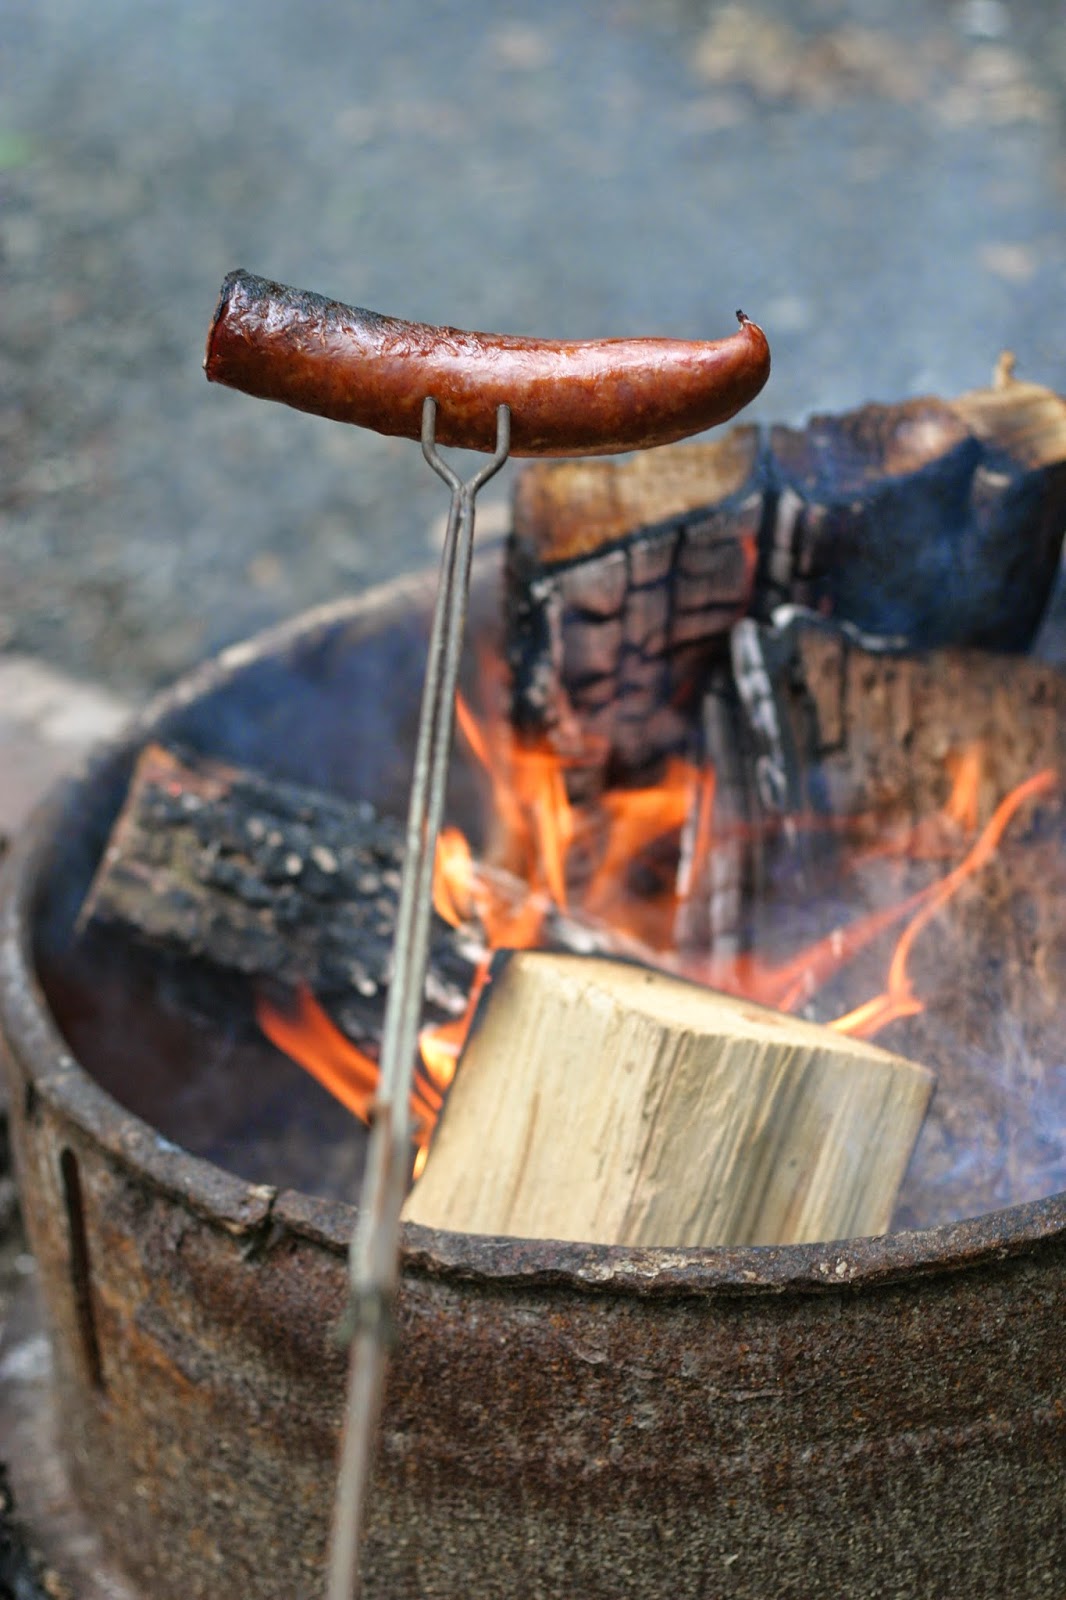
I am writing this blog post while sniffing my camping sweatshirt - I am loathe to wash the scent of wood smoke out of it.


My notes from last time were really useful.

More notes and menus for next time:

1. Tea lights in pint jars are lovely for atmosphere, especially on rainy days, but don't give out much light.
2. An extra bowl and an extra serving spoon are helpful.
3. Mug for every person, not just adults, because hot drinks are nice in chilly weather.  Must have hot drinks like hot chocolate and hot tea in addition to coffee.
4. Whatever vessel is used over the fire will be covered in black soot - good to borrow from camping friends or else get a dedicated pot from a thrift store.  Used my own cast iron frying pan, of course, and took along an old grate from a grill.
5.  Cold cereal and granola are a great camping breakfast because it's easy to be crabby in the morning when you're hungry in an unfamiliar space and trying to start a fire and then cook over the fire.  Much better to move those delicious cooked breakfasts to another meal (see frittata below) and just get everyone fed.
6. An extra bag is helpful - this time it was used for the abundant dirty, wet clothes.
7.  Chop and slice the onions at home so there's no need to take the big chef knife.  I only took a paring knife and a cutting board, which also doubled as a trivet.


Menus:

kielbasa on sticks over fire
buns/ketchup/mustard
popcorn (made at home)

mushroom/Swiss/onion fritatta (ended up scrambling that because the fire was too hot and the eggs were getting too dark on the bottom)
baked beans (home canned)
grilled asparagus over the fire
s'mores


fried fish (filets dipped in cornmeal and Old Bay) - squeeze of lemon
foil packets in the coals with potatoes, onions, olive oil, s&p (note:  triple-wrap the foil!!)
grilled asparagus over the fire
s'mores

hummus
daily bread
carrots
popcorn
s'mores


both breakfasts:
junky cereal that the kids chose rapturously in the discount grocery store
granola
yogurt/milk
strawberries
coffee in the percolator (this was the only appliance we brought along; well, we brought our in-laws' camp stove, too, out of fear of the rain, but managed to cook almost entirely over the fire)

extra snacks:  spicy peanuts, chocolate chip oatmeal peanut butter cookies (made at home), apples


Also interesting to observe:  we gave the children each $3 at the beginning of the vacation and told them not to ask us for treats, that they could control that money and buy their own treats at the camp store.  My, how they obsessed over the money!  Sometimes they appeared to make plans, and other times it was sheer impulse.  They spent it down to the last penny (Tootsie Rolls cost $.01) with lots of drama and junk along the way.  Ben finally got his wish to stick a dollar bill in a soda machine.  I truly hope that is not the highlight of his camping experience.

Tuesday, June 10, 2014

Rice & Beans Bowl

The "bowl" concept is an ingenious way to reframe dinner.  Start with a rather plain, starchy base (rice and beans or noodles), and each person adds toppings to customize, whatever you have on hand.  Kind of like a taco salad concept. Or sometimes, I pour hot stock over the top and we go in an Asian direction, like that always-delicious pho.


Our latest version of rice and beans is very popular.  Our current favorite toppings are garden spinach, guacamole with lemon and scallions, spicy homemade salsa, cilantro, and grated smoked cheese. I thought I'd tell you how I make the tasty beans.


Thrift at Home Black Beans

Cook some dry black beans in twice as much water in slow cooker on low or high until soft.  Depending on the age of the beans, this could take 2-5 hours.  You can soak them ahead of time if you remember.  The average amount of dry beans I use is 2 cups.  Once they're soft, they can sit in their liquid for hours until you need them.  May divide into containers with the liquid and freeze.


In a heavy pan (I use my cast iron Dutch oven), saute an onion in at least a tablespoon or more bacon grease or another fat. Add these seasonings as it's sauteeing (I guessed on the measurements, but at least it gives you some idea of ratio):  1 1/2  tsp. dried oregano, 1 tsp. chili powder, 1/2 tsp. cumin, 1 tsp. salt, 2 tsp. sugar, some ground black pepper.  Turn down the heat and pour in the beans WITH their liquid.  Use a potato masher to mash roughly - I guess I aim to crush about half the beans. Now let the whole business simmer uncovered until the liquid is reduced.  Taste occasionally and add more oregano, cumin, or chili powder, but do not add more salt until the very end because the beans are getting concentrated and it's easy to oversalt at this point. We like to add hot sauce to our individual taste at the table. Cook the beans down as soupy or dry as you like them or as much time as you have.  Can be made ahead and set aside at room temperature for hours.  Serve hot or room temperature over hot rice. Leftovers freeze beautifully.


Monday, June 9, 2014

Bags from Upholstery Samples

My husband brought home a pile of beautiful upholstery samples from the interior decorator at his firm.  She gets new ones each year, so the old ones go the trash (sigh), to a maker like me, or (thankfully) to the local creative reuse store. 

On a tip from A, I made one square into a sleeve for my coupons (fold in half, sew up one short and one long side) and made another sleeve for a pair of sunglasses.  Because these are upholstery samples, they are sturdy and somewhat stiff and the edges are finished.  So fast and easy to work with!

Then I needed an evening bag for a treat at our local opera house.  My friend took me to a show her fiance didn't care to see.


I used 4 shiny upholstery squares to mimic the popular zippered clutch - it's nothing but a rectangle with a zipper on a long side, folded in half to carry.  I lined it with some odd geometric knit scraps that I found in my stash (from a bag of odds and ends my aunt gave me, I think).


I made the tassel from the scraps of leftover upholstery.  I hope you can see the colors - three shades of coppery brown and one of lavender.  I topstitched the joining seams of the squares and the zipper so they would lay nicely.  I used all regular settings on my machine and no pins - simply held things firmly in place as I sewed (you could use binder clips or clothespins).  I'm very pleased with this clutch!

All evening clutch photos by Genevieve! 
We slipped down to the beach for a day already this summer, and I planned this next bag as I tried, yet again, to carry and conceal my legal tender in my bathing suit and pocket-less yoga skirt.  Silly!  But sometimes it takes a while to hatch just the right solution, right?


So, I made this bag the right size to carry my cash, credit card, and phone when I run up to the boardwalk to fetch fries, milkshakes, pizza, and whatnot.  The loop is elastic so it stays on my wrist by itself as I haul all these things back to our umbrella while fending off seagulls.  I'll put the bag to the test next time we go the beach, but I'm pretty sure it will fit the bill.


So far, these upholstery samples are proving to be very helpful!  Our local creative reuse store has samples like this for very cheap, and most interior decorators will be throwing out scads of these every year.

Friday, June 6, 2014

Up on the Ladder

One of the areas my husband and I choose to be thrifty is painting.  We do all our own painting, inside and out.  If you have a fixer-upper house, you have to decide how to maximize your dollars and your time.  I know painting is time-consuming, but we need to save our money for plumbers and electricians and other skilled people with specialized tools and licenses. The way we save time is by ignoring some of the shabby paint!


Of course, we did have to acquire some painting equipment over the years, but this has easily paid for itself as we have used our own time instead of hiring painters. We also buy quality paint (Benjamin Moore) from a local store with wonderfully helpful, knowledgeable staff (locals, email me for my recommendation if you want).  It's not worth it to me to have cheaper paint, especially coupled with the hit-or-miss customer service you get at a big box store.


For example, I've been painting exterior surfaces recently, and I was asking the local paint store
guys for advice on how to paint my Victorian porch railing with its terrible-to-access curls.  We talked about custom spray paint, paint mitts, sponges, and a dab-dab (I bought a dab-dab for $1.89 and it works somewhat better than a paintbrush and isn't splaying out bristles). Over the years, I have picked up lots of professional tips and practices from them.

So when I get down off the ladder (soon! the porch floor is the last hurdle!), I will have some sewing projects to show you and some thoughts on food preservation.


Thursday, June 5, 2014

Strawberries and Brie

Finally, the strawberries are in market.  They're still expensive, but when you have waited all year for the first exquisite strawberries, it's a good treat to buy.


I riffed on an idea I saw on Pinterest, and served sliced strawberries with brie on toast for breakfast.  It was delicious, but I want to more fully copy the idea and use croissants next time.  Buttery richness with the incomparable brie and piquant strawberries on top. . . don't forget the black coffee!


What's your favorite way to have strawberries at breakfast?

Friday, May 30, 2014

Spring in the Urban Garden

Lots of garden activity going on around here!  I snapped some pictures, and this is a long post.

The lovage overwintered in the big pot.  I added thyme and purple basil, as well as some flowers.


Two weeks later, it is lustrous and lush.  And I did add a chervil plant to the side there.


The pots on the front porch posts got begonias and winter savory (still haven't looked up how it's different from summer savory). 


And we got the casualties of potting for pretty:  a marigold and a twig of savory.  I am eternally grateful to A for giving me tiny vases.  I don't always have a big fancy bouquet, but I always have tiny ones.


The hen-and-chicks succulent is coming back in Ben's old sneakers.  


In the spirit of spring, I suddenly furbished up a wire stand I found in the trash several years ago.  Doesn't it look nice in red spray paint?  It holds the shoes now, as well as a baby bay tree (and a clay pot for some stability).  That's a pot of mint next to it.  The winter killed it off in the pot, so I dug some out of my bed and repotted it.  In midsummer, the mint in the bed struggles and gets spotty while the pot keeps going strong.  The bed is close to a black walnut tree, and it's also rather damp there.  


This is a praying mantis nest that our friend Harley gave us.  They will hatch any day now.  We glance at the nest every time we go in and out the back door.


I successfully transplanted an enormous (to me) rhubarb plant from my friend Naomi.  My neighbor identified the vine growing on the fence as a clematis, although it's a mystery to us where it came from. 


Naomi also gave me a big bag of cut rhubarb from another plant.  After several pies, a batch of chutney, and a batch of rosemary rhubarb jam, I am contemplating pickling the rest.


I had put the rosemary plant back outside into a garden bed, but it seemed to be getting powdery mildew.  After a little online research, I yanked it out of the bed and potted it in a clay pot and set it where it could catch the sun and breezes.  Fingers crossed.


And this is spinach, cut from our raised bed from a spring planting.  I absolutely love going out to my back yard and getting something good to eat.  I think I am getting the hang of this gardening thing so I can do that more often.