Showing posts with label baking. Show all posts

Wednesday, April 13, 2022

Chickweed Pastries

Spring is springing lusciously everywhere and it's been a cold one in our area, so all the green and flowers (flowers!!) are so wonderful.

 A few years ago, I learned that chickweed is edible and available in my back yard. We never spray any pesticides or herbicides in our back yard because we have food growing there as well as children running amuck. I did plant some spinach seeds, but in the meantime, I made these spinach pastries by subbing in chickweed from the backyard. 


These pastries come from Extending the Table, which is a companion book to the cookbook I use the most, More with Less. Extending the Table has recipes from cuisines and people all over the world, many of them with stories and insights about food justice and simplicity. The spinach pastry recipe comes from the West Bank, from the Bishara and Selwa Awad family, and they are delicious. Simple ingredients and technique, yet the resulting pastries are definitely from another place and tradition. I love that.


This time, I had two balls of dough left and no filling, so I quickly grabbed some leftover curry from the fridge and made two half-moon pies with it to distinguish from the chickweed filling. Grated cheese would work well also, and I think I have done peanut butter and jelly under duress, too. I served them with home-canned tomato soup. The pastries make nice picnic food, and aren't we all eager to get out into the warm air?

Spinach (Chickweed) Pastries
Combine in bowl:
3/4 cup warm water
1 tsp. active dry yeast
1 tsp. sugar
1/2 tsp. salt
1/4 cup olive oil
2 cups whole wheat flour
about 1 cup all-purpose flour
Knead a few minutes until nice and elastic. This is a lovely dough, not sticky, purely pleasurable to knead. Cover and allow to rise for 1 hour, give or take. Meanwhile, make the filling.
Mix together: 

4 cups packed, chopped spinach or chickweed, fine to include minced stems
3/4 cup finely chopped onion
1/4 tsp. pepper
3/4 tsp. salt
3/4 tsp. ground cumin
2 Tbsp. olive oil
The dough doesn't necessarily need to rise, so when an hour is up, divide it into 18-20 balls. Roll a ball very thin (I find that flour is not necessary here). Put a heaping 1/4 cup filling in middle. Bring 2 edges together to form a cone shape, then the third side to form a triangle. Pinch seams tightly. Place on greased on silpat-lined baking sheet. Bake 350 for 15-17 minutes, until golden brown. Serve hot or warm. The recipe says you can freeze some unbaked pastries to bake later, but I have never done that. 

Tuesday, May 7, 2019

Phoebe is Four


Phoebe has been celebrated for several days now.  She is just a delight, especially when we wonder aloud who would need a present? Or what are these cupcakes for? And let's have a party just because, right? And when Phoebe remembers all over again that it's her birthday, she bubbles over with joy.


Yes, darling, let's have lots of joy. Let's remember the first few moments of your life, your wondering eyes and calm.  Let's see again the sweetness of your brother and sister meeting you for the first time.


We need this joy to counterbalance, to season, the pain of other dear ones who are sick and dying.  And I do believe there is joy for them on the other side of death, but for us who stay here? Oh, that is hard. Phoebe asked me the other day: "when is Uncle Ron going to come back to life?"  Getting Jesus and Easter and our loved ones all stirred in together.

Joy and pain.  The contrast that makes the patchwork of life.


 Let's look now at the Phoebe's birthday cupcakes - made and decorated by Genevieve, shared with preschool friends and then later with grandparents.  I don't have a good photo of the layer cake I made for Phoebe - it's from Smitten Kitchen Every Day and I highly recommend it.  Easy to make and one of the best-tasting cakes I've had in a long time. It was a yellow cake with fudge icing, and Phoebe requested "pink and purple" ice cream, so we had strawberry and raspberry ice cream to go with it.


Happy, happy birthday, darling girl! Many happy returns!


Thursday, April 4, 2019

New Cookbook Review: The Food in Jars Kitchen

The Food in Jars Kitchen is a cookbook after my own heart: it uses little bits of food in clever, flexible ways and gives the home-canned pantry lots of work to do.  I've been keeping track over the years of what my family eats, so I've cut back on making jam because we don't go through much toast and jam.  Marisa is evangelical about people like me in her Introduction - there's so much more to do with jam than toast! She is giving me an "empty-jar-to-empty jar education."


When my copy came in the mail, I put my nose in it and my pencil to paper as I jotted down all the recipes I could make right away.  There are so many! I did make three before I wrote this post, and I will make all of them again.

Also, please note: I received this book free as a review copy, but my opinions and my decision to write a review are my own.


First, I made Popunders.  Isn't that the most adorable name? I made them one morning at breakfast time and while we did, indeed, spoon a little jam in their little hollows, I could also see a dab of cheese or pesto or a bit of anything that I would put on bread.  Popunders are super-fast to whip up, sugar-free, made with pantry staples and standard muffin pans, and just need 20 minutes in the oven, no-preheating needed.

 Even though Marisa recommends them hot from the oven, we found they made a perfectly fine snack at room temperature a few hours later.


For a family gathering, I made the Concord Grape Butter Pizza with Camembert.  Oh! that was delicious! When I make and can grape juice in the fall, I use the spent skins to make grape butter, so I've got plenty of grape butter on hand.

I followed Marisa's pizza crust recipe instead of using my standard favorite, and it was the perfect thickness and texture for its toppings as well as easy to make and handle.  Marisa also explains the ratio of sweet spread to cheese to green topping which is helpful to cooks who want to go off-recipe.  I used Brie instead of Camembert and chopped arugula instead of baby arugula.  So, so, so delicious. I will definitely be making this for future neighborhood potlucks.


Yesterday, I made Marisa's Jam-Lacquered Chicken Wings for supper (excellent name!). I buy whole chickens and when I cut them up to cook, I've been collecting the wings separately in the freezer.  I've never made wings before, just threw them into stock, but I was determined to try since Ben has requested wings several times. 


Marisa's recipe was very clear and produced excellent results.  I didn't know meat can literally cook under the broiler - I typically just use the broiler to brown something.  But the wings cooked under the broiler exactly as Marisa indicated.  To paint the wings, I finished up jars of fig jam and grape butter and added some tomato jam as well as enough runny pepper jam (from 2013! it was waiting for its destiny) to give them a nice kick.


Next time, I will salt the wings on both sides and also broil them on both sides to increase the caramelization.  I find it annoying to get my fingers so messy for such a little bit of  (ok, delicious) meat, but my family was loving these wings, so ok, I do love seeing my people enjoy their food. Too bad my fingers were too sticky to operate my camera!


There is really a lot more to love in this cookbook.  I'm going to use my onion jam in a Goat Cheese Savory Jam Tart, and I'm going to consider all the options for a jar of apple butter that I don't think we will spread on toast.  I appreciate Marisa's inclusion of some basic canning recipes in the final section because I have a deep yearning for Orange Marmalade Ice Cream and no marmalade in my pantry.

 I have two small quibbles with the book, both of which are typical of me and typical of most cookbooks being published (and probably not Marisa's decisions, either).  I prefer spiral bound cookbooks for kitchen use because it's tricky to get a stiff hardcover book to stay open while I cook. But good job keeping the recipes mostly on the same spread! It's also very tricky to turn pages between ingredient list and instructions while cooking.   I also prefer a very detailed index that includes major ingredients as entries so that I can look up recipes based on the ingredients they use, not just the recipe name or type.

I highly recommend the Food in Jars Kitchen cookbook.  It's beautiful to look at and full of recipes for daily cooking - from quick-the-kids-need-a-snack to the fancy-food potluck happening on the weekend. 

Thursday, January 31, 2019

Bright Things I Made

I recently spent hours uploading 2018's photos to Shutterfly, partly to make a surprise project for someone who is probably reading this blog post.  So that's a secret.  But it's so trippy to zip through a year in photos - the events I've forgotten, the details, my children who used to be small, the things I've made.

So here are some things I made that I fully intended to blog, to put on The Record.  Bonus:  they are bright! Perfect for winter when we must make our colors while the natural world sleeps in grey, white, and brown.

I made a new batch of handtowels and aprons (Simplicity 1221) for a shop that promotes young Mennonite makers (I am still young, see). 

I am particularly proud of that little zing of yellow rick rack with the calico and gingham.

 Also, I love yellow and pink together, particularly these strong shades.  I didn't have enough for the belt, so I pieced together the feedsack calico.


I love mixing fabric so much that I like to piece even the toppers for handtowels. Also, I have not forgotten that I owe my readers a handtowel tutorial. 


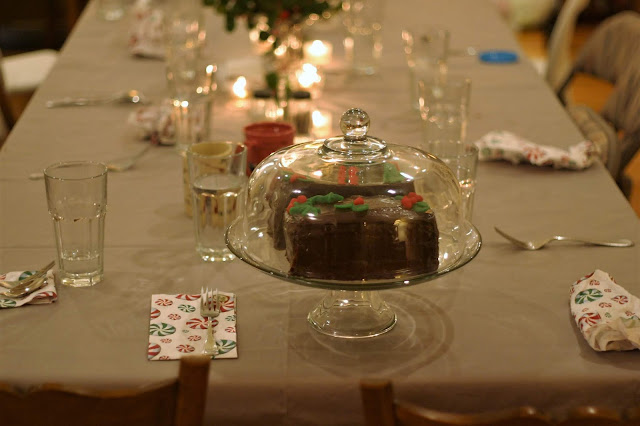
Also, I made a beautiful cake for Christmas day; well, it's presented as two rectangular cakes.  It's the petit fours cake from Smitten Kitchen Every Day: Triumphant Unfussy Favorites

There was some difficulty and swearing involved as is normal for fancy cakes, but oh my word, this cake was beautiful in every respect.  Those are almond paste holly leaves and berries that I colored and formed with my own stained fingers.  On top of ganache, which covers a triple layer of delicious almond cake sandwiched with raspberry jam. So, so delicious.


Hope your winter day has some brightness in it!  Around here, it's terribly cold and I just found out that school is canceled.  This is frustrating to a person like me who makes it a priority to get proper clothing for my family so they can get fresh air in any weather. I'm sure I'll be sending them out to sled!

Thursday, May 31, 2018

Three At Last

Phoebe was sick on her birthday and after her birthday party was rescheduled twice, we finally celebrated with grandparents.  I had baked her cake in early May and stashed it in the freezer, so finally I could pull it out and finish it up.


 It's a wacky cake (chocolate) flavored with bergamot.  So when the recipe called for hot water, I used very strong decaf Earl Grey tea!  I got the idea from my friend Jess.

Then I iced it with Italian meringue tinted pink, and served sour cherries on the side; I got the idea for the cherries from Moosewood - Mollie Katzen calls them Danish cherries, but most of us would call them cherry pie filling.  I decorated the cake with mint leaves and candied cherries (I have them to use in Grandma's Christmas bread), and I do think the effect was more Christmassy than I intended.

I used my frozen sour cherries that the girls and I picked at an orchard last year.  The whole combination was so delicious.  I've been on a kick this year to use fruit in interesting ways for desserts.  Typically, I think I would have served ice cream with this cake.  No one missed it here.


Phoebe loved her cake, loved her party, was just a total birthday champ from beginning to end. She was fascinated by "the number on my cake." She actually tried to eat it in the happy chaos after she blew it out and I was cutting the cake. And now one of her conversation starters is "the number on my cake" and "it's wax, and we don't eat wax."


I'm glad we waited until she could fully participate and appreciate her birthday. She's a kid now, not my baby - I have such mixed feelings about this passage of time.


Saturday, December 16, 2017

Gingerbread Cookies and Snow


I made the gingerbread dough and turned it over to Ben and Genevieve, who fought over it and cut out cookies.  I helped Phoebe cut out a few cookies, too.  Genevieve was so excited to do these cookies, even though she doesn't like them all that much, because she says they are Christmas at our house.  I guess we have traditions now!


This year, I tweaked the recipe just slightly and they got so good!  Plus, the kids did the cookie decorating, too, and landed on a genius flavor combination.  Genevieve made a simple powdered sugar frosting for the cookies and sprinkled crushed candy canes on top. Pow! The spicy cookies plus the sweet frosting plus the sharp peppermint:  so delicious.


Gingerbread cookies and snow - so festive! The children even had a two-hour delay and sledding out of the snow, so they were thrilled.

Gingerbread Cookies - from Colonial Williamsburg, tweaked a bit by me
Stir together in large bowl:
3/4 cup white sugar
2 tsp. ground ginger
1 tsp. ground nutmeg
1 tsp. ground cinnamon
1/2 tsp. salt
1 1/2 tsp. baking soda

Stir in:
1/2 cup melted butter
1/2 cup melted shortening
1/2 cup heavy cream (or evaporated milk)
1 cup blackstrap unsulfured molasses
3/4 tsp. vanilla extract
2-4 drops food-grade lemon essential oil (or 3/4 tsp. lemon extract)

Stir in 1 cup at a time, mixing after each cup:
2 cups whole wheat all-purpose flour
2 cups unbleached all-purpose flour

Dough should be stiff enough to handle and not too sticky - may add up to 1/2 cup of flour if needed.

Roll to 1/4" thickness on floured surface.  Cut into shapes. Place on silpat-lined baking sheets (or greased). Bake 375 for 10 minutes, just until top springs back when touched.

Wednesday, June 7, 2017

"French" Fruit Tart

The Frenchiness here is of the 1980s variety, that was meant to make something sound fancy.  The original recipe was on the back of the Bisquick box, so we can all predict the results, right? But no.  This is a perfect trifecta of flavors and textures: salty/buttery crust, luscious middle with the best of cream cheese and heavy cream, and whatever wonderful perfect fresh fruit is in season on top.


And look, the ingredients are simple, practically pantry staples, and the method is also very simple.  I mean really.  This is me raving.  I highly recommend that you make this tart!


The only downside is that it is best eaten several hours after it is made, or possibly the day after for particularly smitten eaters.


"French" Fruit Tart - adapted from a recipe I found on The Kitchn

Make the tart crust.
Cut together:
1 cup all-purpose flour (I use up to 2/3 WW pastry flour)
1/3 cup butter
2 Tbsp. powdered sugar
1/4 tsp. salt
Press mixture into 9 or 10" tart pan or pie pan.  Prick bottom with fork.  Bake at 425F for 10ish minutes.  Set aside to cool.

When the crust is cool, whip in a mixing bowl:
8 oz. cream cheese, room temperature
1/3 cup sugar
1 tsp. vanilla

Add and beat to soft peaks.  Do not overbeat:
1 cup heavy whipping cream

Dollop and spread filling in crust.  Top gently with fresh sliced berries or other seasonal fruit, arranged in a pattern or sprinkled over in a single layer.  Brush with some melted apple jelly or simple syrup (I use simple syrup - heat together 1/2 cup sugar and 1/4 cup water until dissolved, then cool and keep in fridge).  Sometimes I don't bother brushing anything on the fruit.
Refrigerate for at least 2 hours before slicing and serving.


This tart really needs a better name.  Suggestions?

Monday, May 15, 2017

Raspberry Buttercream: A Cautionary Tale

Pride goeth before a fall.  Yes.

My sister proposed a joint birthday party for herself and Phoebe and I jumped at the chance to make whatever birthday dessert she desired.  She ultimately wanted a layer cake and let me choose, as long as it involved chocolate.  I returned with high hopes to Vintage Cakes by Julie Richardson; I had made a wonderful Italian Cream Cake from her book, and I wanted to make another fancy cake.

I chose The Pink Cake, a luscious (read: lots of fat and special ingredients) chocolate cake with a "raspberry buttercream."  To me, a buttercream icing is the kind where you beat butter with powdered sugar and a little milk and vanilla and done.

However, there is an alternate universe of Buttercream-That-Will-Make-You-Cry where buttercream involves a pound of butter, six egg whites and in this case, a whole bag of frozen raspberries pushed laboriously through a strainer to make them seedless.  And the technique:  people, the technique is bizarre and tedious and there is a tightrope to walk and if you fall off, the buttercream will die (and you will cry).


Actually, after about 10 minutes of my mixer on high, my Buttercream-That-Will-Make-You-Cry did actually look like a dreamy cloud, but then I dumped in the raspberry puree with the vanilla and salt as Julie Richardson airily said to do and the whole thing went to curdled hell.

 I tried tricks because at that point, I discovered via Google that I had been walking a tightrope and there were tricks for this icing.  I tried adding chocolate, an emulsifier.  I tried a period in the fridge.  I tried calling my best friend and wailing (she recommended hurling it on the compost pile). I tried beating it an additional 20 minutes. Yes, TWENTY. I tried microwaving parts of it and reintroducing it back to the flecked mess in the bowl.


Please note that at this point, I had not cried.  I was mad because I had put a lot of time and ingredients into the Buttercream-That-Will-Make-You-Cry and I wanted to taste that chocolate cake against the pink raspberry heaven.  Instead, I whipped up a peanut butter icing and put it between the triple layers, and then swathed the whole thing in cheater Italian meringue (7 minutes to make, start to finish).


During the car ride to the party, guess what those dumb old stupid cake layers did while I cradled them like a precious baby in their cake stand?  They slid sneakily and irrevocably apart.  So that's when I cried.

The cake was pretty good.  The birthday girls were pleased.  I was mostly mollified.  But I still have a bowl of red and white curds in the fridge that I'm not sure what to do with.


Had it uncurdled itself, my icing would have been a much darker pink than Julie Richardson's photo of The Pink Cake in her cookbook.  I followed her instructions for amounts to the letter, although she did not indicate how much raspberry puree was supposed to result from 4 cups of frozen berries.  I think my buttercream suffered from too much acid and water from the raspberry puree, and I wish she had included an exact amount to add so I could have ended up with pink Buttercream-That-Made-Me-Cry-From-Sheer-Deliciousness.  But I've passed on my experience to you and I'm happy to hear your buttercream tales (of woe or delight), too.