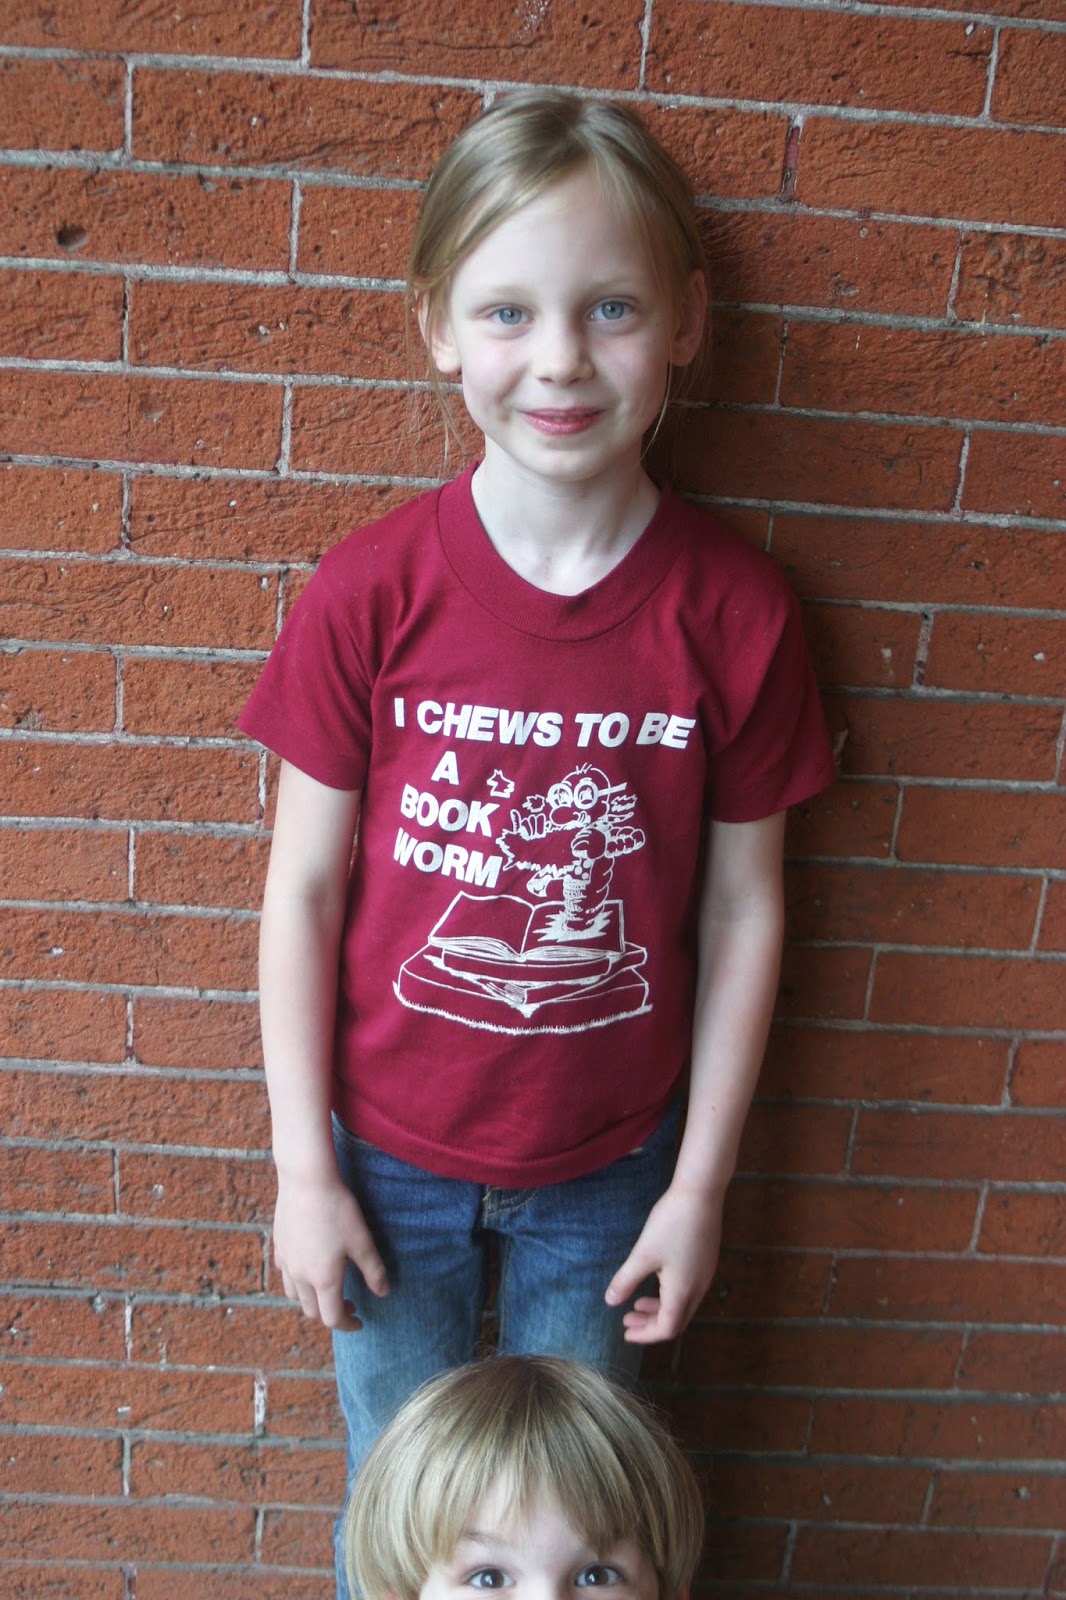
Genevieve is seven-and-a-half years old and she is ready. We are taking a bit more formal approach to cooking this summer. Every Wednesday, we will have a cooking lesson and then I will share it with you!
Genevieve flew down the steps to get the eggs out of the fridge although normally she lolls in bed as long as possible. What a nice sign of her interest and pleasure in cooking lessons!
I hadn't thought through much of what I was going to say or teach, unusual for me. I simply talked her through the process of frying eggs and making toast, trying to let her make her own mistakes when possible and offer simple tips when possible. She was tractable (praise God! - a good sign that the timing is right!) and pretty competent.
Genevieve learned how to turn the stove burner on, how much bacon grease to put in the pan, how to flip eggs over-hard, and how to go back and forth from toaster to stove to get the eggs and toast out at relatively the same time. She learned how hard it is to tug open the oven door where the skillet is kept. She swiped the lid of the butter dish to the floor, breaking it in two tidy pieces that have already been glued together (whew - I do like that butter dish). So we talked about keeping things back from the edge of the counter.
I purposely kept the lesson to once a week to make sure I would follow through and not be overwhelmed. Yet when I was putting together the lemon chiffon pudding for our first strawberries, she stayed wistfully and insistently at my elbow until I put the mixer in her hand and showed her how to turn it on. I am deeply gratified by her interest and I hope I can show her what pleasure and creativity I enjoy in the kitchen. I welcome any advice you have for me!
Wednesday, June 12, 2013
Monday, June 10, 2013
Summer Goals 2013
This is the structure that we established this summer:
Monday - library with Dad
Tuesday - market with Mom, vacuum, clean kids' room
Wednesday - G cooking lesson with Mom, Mom pay bills/desk/inbox
Thursday - sketching with Dad
Friday - vacuum/dust house, day of reckoning for stuff, G piano lesson with Mom
Saturday - change sheets, clean bathroom
Daily: G feed rabbit, fold laundry, quiet time, help Mom and Dad with other chores, set table, clear table, clean up toys
(Last summer's schedule and some more explanation is here)
The notable changes:
1. Genevieve and I are doing cooking lessons together. More on that tomorrow.
2. I separated cleaning the kids' room from the rest of the house cleaning. I was getting too frustrated and it was getting short shrift. I would really like to be more patient and detailed in teaching the children how to sort and organize their desks this summer.
3. My husband wants to teach the children some drawing principles.
4. We've always gone to the library randomly, usually when the adults needed something. But now, we are experimenting with a regular library day because Genevieve has turned into a voracious reader. It's exciting! And way more economical to keep her in books by checking them out from the library.
Other than cooking lessons, I didn't make a list of specific tasks I want to teach the children this summer. It might come to that, but for now, they are both handling the tasks we give them pretty well. They are also both very grateful for quiet time after the obligatory kick-and-fuss-for-a-few-minutes.
This schedule will probably wiggle around some to accomodate lots of swimming at the pool this summer, but for now, we are really enjoying our relaxed, yet purposeful, days.
Monday - library with Dad
Tuesday - market with Mom, vacuum, clean kids' room
Wednesday - G cooking lesson with Mom, Mom pay bills/desk/inbox
Thursday - sketching with Dad
Friday - vacuum/dust house, day of reckoning for stuff, G piano lesson with Mom
Saturday - change sheets, clean bathroom
Daily: G feed rabbit, fold laundry, quiet time, help Mom and Dad with other chores, set table, clear table, clean up toys
(Last summer's schedule and some more explanation is here)
The notable changes:
1. Genevieve and I are doing cooking lessons together. More on that tomorrow.
2. I separated cleaning the kids' room from the rest of the house cleaning. I was getting too frustrated and it was getting short shrift. I would really like to be more patient and detailed in teaching the children how to sort and organize their desks this summer.
3. My husband wants to teach the children some drawing principles.
4. We've always gone to the library randomly, usually when the adults needed something. But now, we are experimenting with a regular library day because Genevieve has turned into a voracious reader. It's exciting! And way more economical to keep her in books by checking them out from the library.
Other than cooking lessons, I didn't make a list of specific tasks I want to teach the children this summer. It might come to that, but for now, they are both handling the tasks we give them pretty well. They are also both very grateful for quiet time after the obligatory kick-and-fuss-for-a-few-minutes.
This schedule will probably wiggle around some to accomodate lots of swimming at the pool this summer, but for now, we are really enjoying our relaxed, yet purposeful, days.
Sunday, June 9, 2013
Finally, a Solution for Playing Out of Hymnals
Back when we toured a local historic farmstead, a musician was playing out of tight little hardcover music books from the 1800s. He kept them open with large wooden clothespin-looking things. I couldn't concentrate on his talk because I was staring at the wooden pins.
I love to play hymns out of my hymnals where I jot notes to myself on the margins, but it was a perennial problem to keep the hymnal open. I was always propping it under books or grabbing at it as it flapped shut midway through the song. I don't like to use the spiral-bound hymnal for accompanists at church (no notes!) and I don't want to make photocopies (an avalanche of paper!).
Clearly, I needed those wooden pins or their equivalent.
There are giant binder clips, but the ones I found were about $10 apiece. Then, one day in the local art store, I came across large silver clips for $1.25 apiece.
They work! They are large enough to handle the biggest hymnal I have, and I am so pleased. I haven't seen this solution among the musicians I know, but perhaps this is a common trick for professionals and I just missed it all these years.
I love to play hymns out of my hymnals where I jot notes to myself on the margins, but it was a perennial problem to keep the hymnal open. I was always propping it under books or grabbing at it as it flapped shut midway through the song. I don't like to use the spiral-bound hymnal for accompanists at church (no notes!) and I don't want to make photocopies (an avalanche of paper!).
Clearly, I needed those wooden pins or their equivalent.
There are giant binder clips, but the ones I found were about $10 apiece. Then, one day in the local art store, I came across large silver clips for $1.25 apiece.
They work! They are large enough to handle the biggest hymnal I have, and I am so pleased. I haven't seen this solution among the musicians I know, but perhaps this is a common trick for professionals and I just missed it all these years.
Friday, June 7, 2013
Banana Milk
Once upon a time, I had overripe bananas on the counter. I was planning to give milk to the children at breakfast anyway, so I just blendered the bananas in the milk. I put it in cups with straws which makes my children deliriously happy.
I was pleased to have an easy, nutritious breakfast drink. Sometimes I use kefir or yogurt instead of milk. It's a nice way to tempt lagging appetites in a heat wave as the cool drink slurps down so easily. Also, you can toss overripe bananas directly into the freezer and they could be used in this drink or in baked goods.
I used to think smoothies needed 10 ingredients, 1 of them kale, and at least 5 others bought at the health food store. I'm not fond of a smoothie as a meal (I like chewing), so I serve banana milk as the fruit and dairy in the menu.
To wit:
banana milk
peanut butter toast
banana milk
French toast (pictured above is pb&j French toast)
banana milk
muffin (lemon poppyseed, oatmeal blueberry, rhubarb, etc.)
I was pleased to have an easy, nutritious breakfast drink. Sometimes I use kefir or yogurt instead of milk. It's a nice way to tempt lagging appetites in a heat wave as the cool drink slurps down so easily. Also, you can toss overripe bananas directly into the freezer and they could be used in this drink or in baked goods.
I used to think smoothies needed 10 ingredients, 1 of them kale, and at least 5 others bought at the health food store. I'm not fond of a smoothie as a meal (I like chewing), so I serve banana milk as the fruit and dairy in the menu.
To wit:
banana milk
peanut butter toast
banana milk
French toast (pictured above is pb&j French toast)
banana milk
muffin (lemon poppyseed, oatmeal blueberry, rhubarb, etc.)
Wednesday, June 5, 2013
Why and How To Clean Your Chest Freezer
The Why:
Cleaning the a free-standing freezer means taking everything out and defrosting the freezer, a perfect time to take inventory of what you have; do this casually or write it down on paper. I defrost my freezer when I see a build-up of hard frost on the walls and, in this case today, creeping up under the seal.
The How:
1. Bring a stockpot of water to boil on the stove. (I took pictures only of the bike trailer; I was making sushi for lunch, hosting a child helper in the kitchen, fielding phone calls, and washing dishes throughout these steps. Yes, I like a bit of high-speed kitchen chaos now and then to remind me of my waitressing days.)
2. Prepare a clean space on the floor next to the freezer. I put down an old vinyl tablecloth on the basement floor.
3. Turn off the freezer if there is a control. For extra measure, unplug it.
4. Remove all the food from the freezer. Mine is in several milk crates and a freezer basket, so it's not too hard to lug it out. Schlep the meat to another freezer (thank you, dear husband) or an ice chest if you're worried, but don't worry, your food will be back in the clean freezer in 1-2 hours, max. Insulate the frozen food on the floor with a blanket or two if you wish - it will be more energy-efficient if it's frozen going back into the freezer. Do not worry about a little thawing - the food will be fine.
5. Set a trivet on the floor of the freezer. Place the pot of boiling water, uncovered, on the trivet and close the freezer lid. Depending on how thick the hard pieces of frost are, you will hear chunks of it falling onto the freezer floor with 30 minutes. Check on the frost and tug on it if you are impatient. Really impatient people should probably plug in a hair dryer and help it along (I don't bother).
6. Pile the chunks of frost in a dishpan and give them to the children, the garden, or whatever.
7. Get a towel and soak up the extra liquid on the floor of the freezer or, if it's handy, pull the drain plug.
8. Get a bucket of water with a squirt of dish soap and a rag; extra-sanitary people wearing old clothes can add a glug of bleach (I don't). Wipe out the freezer and if yours is like mine, there is weird unmentionable glop on the bottom.
9. Turn the freezer back on and plug it in if you unplugged it (I don't).
10. Place your food back in the clean freezer - this is a good time to take inventory as you do. I was surprised by shrimp shell stock and sauerkraut.
Since I counted the preserved items, I know that I only have one box of strawberry jam left. By looking over the records in my preserving notebook, I know how many berries to order to make jam. I went ahead and did an inventory of the remaining canned jars I have, so now I can start making a list of what I want to preserve this summer and fall.
I wrote this post mostly for myself because I seem to draw a blank every time I want to clean the freezer (NOT often, believe me). Next time, I will borrow an ice chest for the meat and Mr. Thrift will not bike it around town.
Cleaning the a free-standing freezer means taking everything out and defrosting the freezer, a perfect time to take inventory of what you have; do this casually or write it down on paper. I defrost my freezer when I see a build-up of hard frost on the walls and, in this case today, creeping up under the seal.
| Mr. Thrift takes the frozen meat across town in the old bike trailer. His idea. |
The How:
1. Bring a stockpot of water to boil on the stove. (I took pictures only of the bike trailer; I was making sushi for lunch, hosting a child helper in the kitchen, fielding phone calls, and washing dishes throughout these steps. Yes, I like a bit of high-speed kitchen chaos now and then to remind me of my waitressing days.)
2. Prepare a clean space on the floor next to the freezer. I put down an old vinyl tablecloth on the basement floor.
3. Turn off the freezer if there is a control. For extra measure, unplug it.
4. Remove all the food from the freezer. Mine is in several milk crates and a freezer basket, so it's not too hard to lug it out. Schlep the meat to another freezer (thank you, dear husband) or an ice chest if you're worried, but don't worry, your food will be back in the clean freezer in 1-2 hours, max. Insulate the frozen food on the floor with a blanket or two if you wish - it will be more energy-efficient if it's frozen going back into the freezer. Do not worry about a little thawing - the food will be fine.
| I call this his pick-up truck. |
5. Set a trivet on the floor of the freezer. Place the pot of boiling water, uncovered, on the trivet and close the freezer lid. Depending on how thick the hard pieces of frost are, you will hear chunks of it falling onto the freezer floor with 30 minutes. Check on the frost and tug on it if you are impatient. Really impatient people should probably plug in a hair dryer and help it along (I don't bother).
6. Pile the chunks of frost in a dishpan and give them to the children, the garden, or whatever.
7. Get a towel and soak up the extra liquid on the floor of the freezer or, if it's handy, pull the drain plug.
8. Get a bucket of water with a squirt of dish soap and a rag; extra-sanitary people wearing old clothes can add a glug of bleach (I don't). Wipe out the freezer and if yours is like mine, there is weird unmentionable glop on the bottom.
9. Turn the freezer back on and plug it in if you unplugged it (I don't).
10. Place your food back in the clean freezer - this is a good time to take inventory as you do. I was surprised by shrimp shell stock and sauerkraut.
Since I counted the preserved items, I know that I only have one box of strawberry jam left. By looking over the records in my preserving notebook, I know how many berries to order to make jam. I went ahead and did an inventory of the remaining canned jars I have, so now I can start making a list of what I want to preserve this summer and fall.
I wrote this post mostly for myself because I seem to draw a blank every time I want to clean the freezer (NOT often, believe me). Next time, I will borrow an ice chest for the meat and Mr. Thrift will not bike it around town.
Tuesday, June 4, 2013
Kombucha in My Kitchen
You asked me what fermented foods I am consuming at every meal to combat acid reflux and rebuild healthy bacteria. I call this "live food," as opposed to "dead food" which doesn't contain living organisms.
Kombucha is one that I drink when nothing else is readily available.
Like when I went to New York for three days for work recently. I took a jar of yogurt and a plastic bottle of kombucha and got along just fine with a minimum of fuss.
Kombucha is fermented black tea - you need to have the SCOBY (symbiotic community of bacteria and yeast) which is very strange looking in order to ferment the sweet tea. Any locals who want a kombucha starter SCOBY, please email me privately from the link on the sidebar and tell me, as mine is growing vigorously.
Per Rebecca's directions, I've been doing a secondary fermentation. I've got a gallon jar of kombucha just hanging out with its SCOBY. Then I pour off a bottle of the kombucha, seal it, and let it sit for a few days to build up a high level of fizz. I do this in a plastic bottle so I can press on the side to see how much pressure is building up; you want to be careful with this, as the pressure can make glass jars explode and I'm sure you can imagine the hazardous mess that ensues! Refrigeration slows the pressure way down, as does loosening the cap.
I am a novice at this sort of thing, so I'm not sure how many questions I can safely answer about kombucha.
Like when I went to New York for three days for work recently. I took a jar of yogurt and a plastic bottle of kombucha and got along just fine with a minimum of fuss.
| preparing the sweet tea to feed the big kombucha jar |
Kombucha is fermented black tea - you need to have the SCOBY (symbiotic community of bacteria and yeast) which is very strange looking in order to ferment the sweet tea. Any locals who want a kombucha starter SCOBY, please email me privately from the link on the sidebar and tell me, as mine is growing vigorously.
Per Rebecca's directions, I've been doing a secondary fermentation. I've got a gallon jar of kombucha just hanging out with its SCOBY. Then I pour off a bottle of the kombucha, seal it, and let it sit for a few days to build up a high level of fizz. I do this in a plastic bottle so I can press on the side to see how much pressure is building up; you want to be careful with this, as the pressure can make glass jars explode and I'm sure you can imagine the hazardous mess that ensues! Refrigeration slows the pressure way down, as does loosening the cap.
I am a novice at this sort of thing, so I'm not sure how many questions I can safely answer about kombucha.
Sunday, June 2, 2013
A Simple Bulletin Board
I had accumulated a stack of little things in my room that I wished to hang up. Cork bulletin boards are expensive and all the DIY projects on Pinterest were too cutesy or required materials I didn't have.
When I stumbled across this tutorial for a bulletin board made of cardboard, I got up immediately from the computer, went to the basement and grabbed a cardboard box.
This was easy. I didn't buy a single thing and I only asked my husband one question. I was going to drill holes through the layers to hang the thing up, but he thought that might twist and pull the fabric, so he recommended the awl on his Swiss army knife. Easy. Done.
Supplies I used:
2 pieces of mostly straight cardboard, cut out of a big box with a utility knife
big piece of plain canvas fabric + scissors
duct tape
spray adhesive + pumice stone
2 toggle buttons
long ribbon + awl
nail + hammer
The pumice is necessary to get any spray adhesive off your fingers. I used Elmer's like I did when I covered the coffee can and it's supposed to clean up with soap and water, but 5 handwashings later, I used the pumice for perfectly clean fingers. Now I know!
And now the board is entirely covered with my children's papers. I wish it was, you know, cool and stylish, but my heart is warm and proud from their love. Too soon they will be out of the nest and I will hope wistfully for loveletters from grandchildren.
Bonus: I snapped some more photos of my room.
When I stumbled across this tutorial for a bulletin board made of cardboard, I got up immediately from the computer, went to the basement and grabbed a cardboard box.
This was easy. I didn't buy a single thing and I only asked my husband one question. I was going to drill holes through the layers to hang the thing up, but he thought that might twist and pull the fabric, so he recommended the awl on his Swiss army knife. Easy. Done.
Supplies I used:
2 pieces of mostly straight cardboard, cut out of a big box with a utility knife
big piece of plain canvas fabric + scissors
duct tape
spray adhesive + pumice stone
2 toggle buttons
long ribbon + awl
nail + hammer
The pumice is necessary to get any spray adhesive off your fingers. I used Elmer's like I did when I covered the coffee can and it's supposed to clean up with soap and water, but 5 handwashings later, I used the pumice for perfectly clean fingers. Now I know!
And now the board is entirely covered with my children's papers. I wish it was, you know, cool and stylish, but my heart is warm and proud from their love. Too soon they will be out of the nest and I will hope wistfully for loveletters from grandchildren.
Bonus: I snapped some more photos of my room.
| A trash-picked frame around the daisy clock. |
| The clean surface where the pile of children's papers used to be. Ahhhhh. |
Subscribe to:
Posts (Atom)