Friday, November 30, 2012

Piano Lessons at Home

Both our children show a musical bent; we told them that when they learn to read, they can start piano lessons.  I decided to see if it would work for me to teach Genevieve at home for a while - a little toe-dip into homeschooling, if you please.  I took 10 years of piano lessons as a girl, and I still play for church occasionally.


For accountability, I marked the calendar for a 10-minute lesson each Friday afternoon; Genevieve calls it "turning the page" because we just turn a page a week.


I borrowed most of the books from a friend, a former piano teacher; I got the first three on amazon for about $20. 

For the first few lessons, Genevieve was enthusiastic; now I am seeing that her learning style with me is fear of failure, so she can be reluctant to try a new step because it won't be perfect.  She is supposed to practice her page every day, but, you know, it doesn't always happen.

 
As long as her musical ability is blossoming and we're working well as teacher and student, we'll keep going.  I also really love not herding the children out the door to get somewhere on time every Friday afternoon.


(all photos on this post courtesy of my husband)

Wednesday, November 28, 2012

Ben Elevates Basic Cornbread

It suddenly occurred to Rebecca and me, by telepathy on the very same day (I'm not kidding) that we should split leftover cornbread and melt some cheese on top. 


When I served just such a piece to Ben at lunch with soup, he asked politely and firmly for honey on top.  I explained that the bubbly, toasted cheese was the topping, but he insisted.  And guess what?  honey on top of toasted cheese on top of cornbread is delicious!  Smart boy.

I thought it would be tasty for breakfast.  It is.  I told Ben he invented a new breakfast.


I tried some blackberry jam with the cheese, too, and it was also great.  We had Pink Lady apples on the side, and age-appropriate hot drinks.

This is an excellent way to use leftover cornbread; the other way is to make cornbread dressing.


Basic Cornbread from More with Less

Bad cornbread is really bad; it is dry and crumbly and hard to choke down.  I am careful not to overmix the batter and not to overbake the bread; I get tender, moist cornbread every time.  Also this recipe is so quick to whip up that the oven is never preheated by the time I'm ready to slide the pan in! 

In a mixing bowl, combine with a whisk:
1 c. cornmeal
1 c. whole wheat flour
4 tsp. baking powder
1/1 tsp. salt
2 Tbsp. brown sugar

Make a well in the dry ingredients; this gives you a headstart on mixing without beating so hard that you turn out a dry, crumbly bread.

Put in the well:
2 eggs

Break them up with a whisk.  Beat slightly.


Add to the eggs in the well:
1 c. milk
1/4 c. vegetable oil

Mindfully, pay attention, and stir JUST until mixed.  It's okay if there are streaks of flour and egg.  Pour into a greased 9x9 pan or equivalent cast-iron frying pan.  Bake at 400 for 20-25 minutes, when bread has pulled away from the sides of the pan and is lightly browned.  Better to underbake than overbake!  I use my cast-iron skillet and only bake for 18-20 minutes because the cast iron bakes faster than aluminum or glass.

Tuesday, November 27, 2012

Soap-Making for the First Time

Here's how I came to soapmaking:  I used the beef bones from our quarter of beef to make stock.  There was so much fat on the top that I couldn't bear to throw it away.  It sat in my fridge and freezer for a long time - for a couple of years, I think.  I finally offered it to a local soapmaker, but it didn't fit her method.  Another year went by.  I was shopping for reasonably priced bars of soap for handwashing and suddenly I thought:  why can't I use the tallow and make soap?

melting the fats


So I did. . . . after checking out numerous books from the library, reading some conflicting information online, making copious notes, and waiting for a time at home alone (not wise to work with lye around little kids who don't understand how caustic it is or how the fumes can get around).


I bought coconut oil from the Latino store nearby.  I bought lye from the hardware store in the town where I work.  I borrowed a digital scales because I have an old-school scales that I love and couldn't justify another scales for what might turn out to be a one-time use.  I already owned a stick blender, an instant-read thermometer and a candy thermometer; the tallow was a waste-product from making stock, and I keep the distilled water on hand for my iron.

I lined a cardboard box with pieces of heavy plastic I cut from a bag.  This was my mold.


I read my notes one more time, set out all the equipment, and off I went!  The actual soapmaking process is pretty simple:  make the fats melted and warm, add the lye to water and get the temperature down to warm, blend the fats with the lye/water until thickened, pour in a soap mold, cut into bars after 24 hours, cure for 6 weeks. 

the cardboard mold on top of my fridge for 24 hours - I'm afraid that's how my fridge usually looks


If you're going to make soap, however, do not rely on me for directions, but consider this post inspiration and introduction only.  I highly recommend Smart Soapmaking by Anne L. Watson, although I did not bother to test the finished bars with pH strips, nor did I get completely suited with protective gear when I handled the lye but rather acted with caution and purpose as my grandmothers would have.  I wore gloves and an old apron. 


It was hard to find a tallow recipe that suited the amount I had, but I found one at Miller's Soap that I halved, check on a lye calculator, and used:

Tallow Blend Soap
22 oz. tallow
10 oz. olive oil
10 oz. coconut oil
5.8 oz. lye crystals
16 oz. distilled water


The soap is pale green because when I make stock, I add vegetable tops and the resulting stock and fat has a shade of green in it.  I did not add scent because I love subtly scented soap such as shea butter, honey, oatmeal, or goat's milk.


Now the soap is sitting on its plant nursery tray in a closet to cure.  It is drying out and hardening up some more.  I can't wait to get out the first bar next year!  There was a little piece stuck in the corner of the plastic bag, so I stuck that on my kitchen bar and it seems to be quite nice.  I'm a little surprised that I made soap and it works! 


I'm adding this to my list of homemaking skills and probably when I've saved enough waste-fat, I'll make soap again.

Monday, November 26, 2012

2 Tips for School Mornings

After a nice Thanksgiving break, the children are back to school this week.  It really was a pleasant break and I did not spend it wishing for it to be over.

Here are two organizational tips for school that have been making our lives easier:

When I remember, I jot down what's available for school lunches that might not be readily obvious.  Sandwiches are always an option, so I don't bother to put them on the list. 

I learned the trick for creating an easy white-board when I was the teacher in study hall years ago and had to generate many seating charts:  use a vinyl sheet-protector and slide a sheet of paper in it. Use a dry-erase marker on it, just write and wipe like you would on a white board.  (I just looked at the package I bought - these things are called "document pockets" and they are side-loading, meant to be put in three-ring binders).

 
The second tip comes from my husband.  He made this visual by putting masking tape labels around the clock in our dining room to help Genevieve see what getting ready for school looks like. 


It dovetails with the unit on how to tell time she is doing at school.  The times don't correspond exactly with the reality of a school morning (there is no freakin' way it only takes my children 10 minutes to eat a meal - 10 hours is more like it), but it's been helpful to point to the clock and urge Genevieve on. 


One of the lovely things about vacation, actually, was ignoring the clock in the mornings and putzing around in our jammies.  We are trying to teach the children how to get into quick, efficient mode when it's called for (school mornings, apppointments, bedtime, etc.), but allowing them to linger and lollygag other times.

Friday, November 23, 2012

A Little Black Friday Madness in the Shop

Look, I'm not ready for Christmas, but apparently some people are and other people just like a good sale.  So here you go:

20% off my entire etsy shop - use the coupon code CYBERMONDAY12


I've been making silverware rolls for the shop! 


Sale ends on Cyber Monday (11/26) when I turn it off before I go to bed (probably about 10 pm, EST).

Thursday, November 22, 2012

Praise and Thanksgiving

I don't often try to capture special events with my camera - I'm usually just after the daily details.  But today, as the mood struck, I picked up my camera and captured a chronology I love (see 2010's here). 

I don't have pictures of my husband setting off on a bike ride, or Genevieve hot on the trail of her new game, Hangman, or the apple pie my father-in-law made with a fancy crust.  But now I wrote it down and I'll remember.

Out of bed directly outside to see the bunny.


The ugly bird - raised with care and purity by Rebecca and her family. 
 
 
Still in pajamas, but breakfasted on buckwheat cakes. (I finally got dressed at 10:30).
 
 
My mother-in-law's sideboard with an oak leaf my children gave her.


Another entrancing tableau.
 
 
The cranberry relish I contributed.
 
 
My mother-in-law makes the best mashed sweet potatoes with fresh cranberries. (It's not possible to have enough cranberries on Thanksgiving, in my opinion.)
 
 
Ben declined chocolate pecan pie to sit and draw apart.  He collected admirers.


It was a lovely, relaxed day.  Thank you, thank you, thank you, God.

Monday, November 19, 2012

Hearty Oatmeal Pancakes Using Whey

Greek yogurt is easy to love, right?  You don't have to pay its pricey price and deal with all the little plastic cups, though!  All you need to do is strain off some of the liquid (which is whey) in regular yogurt.  I line a strainer with cheesecloth and set it over a bowl; other people hang it up in a bag similar to making jelly; still other people use a coffee filter.


And then you have thick, Greek-style yogurt. . . and whey.  Don't throw it away!  The whey is super-nutritious.  My favorite way to use it is in pancakes, but I've been looking around for additional uses.  I'd welcome your suggestions in the comments, too.


Hearty Oatmeal Pancakes, adapted from Simply in Season

The following mixture needs to soak for 8-12 hours; generally, this means mix this up the night before you want pancakes for breakfast.

Mix together, cover, and leave at room temperature for 8-12 hours:
2 cups rolled oats
2 cups whey, plain yogurt, buttermilk, sour milk, or mixture of these*

When you're ready to fry the pancakes, add and stir into the oat mixture:
2 eggs
1/4 cup oil

Add and stir just until mixed:
1/2 cup whole wheat flour
1 tsp. baking powder
1 tsp. baking soda
1/4 tsp. salt

Batter will be very thick.  Place a glop on a hot, lightly greased griddle and spread evenly and gently so the pancake is not too thick - I make these pancakes on the small side (5" diameter or less) or they break when I flip them.  When bubbles appear in the middle and the edges look a bit set, flip.  Makes 6-8 pancakes.


*Sometimes I only have yogurt on hand, so I use at least a cup of yogurt and then fill up the measure with milk.  Also, note that the whey used here is sometimes called "sweet whey" to distinguish it from acid whey which comes from making cheese; I don't have any experience with acid whey.

 
Ever freeze berries and then not know what to do with them?  I do.  Thanks to Amy at Angry Chicken, we have a new favorite use for frozen berries:  warm some frozen berries in maple syrup or pancake syrup in a small pan on the stove.  The berries will color and flavor the syrup as they thaw - give it maybe 10 minutes to turn into a lovely fruity syrup. 
 
You could further mash up the berries a bit, but I don't usually bother because, by then, I am ravenous.  I took lots more photos than these, but they were all blurry from my low-blood-sugar shakes and the low light of early Saturday morning.


Eat your fruity syrup over pancakes with peanut butter or over, you know, Greek yogurt.

Friday, November 16, 2012

Little Tiny Quilts

Theoretically, hotpads should be made with dark materials and minimal time; they are kitchen workhorses and soon my cast iron pans ingrain them with dark smudges and grease.

I was experimenting with handquilting using perle cotton.  I enjoyed the process and I like the results!
 
But I keep making and selling hotpads lavished with design and time.  What am I doing? 

I finally realized that I am making little tiny quilts because I keep playing with patchwork, quilting styles, and color.  I get a patchwork idea and I want to try it out immediately, not trudge through the full-scale quilt process (I do love making big quilts, too, and I've got one on the go with two more queued behind it).


So when I completed this last set of hotpads, I put them in my etsy shop differently.  I photographed them as a group, although I'm selling them singly.  I called them art quilts.  I recommended them as nursery decor.  It's an experiment and I'm curious to see how it turns out.

 
Almost as curious as I am about playing with navy in the next round of hotpads/mini quilts. . .

(linking up with the Make Eat Grow blog hop)

Thursday, November 15, 2012

Shelves in the Bedroom

I petitioned my husband to put up some shelves in the bedroom.  Considering what he's got on his plate right now, I felt timid asking. But I had this idea for these shelves for a long time, and Leila issued a challenge to tackle the master bedroom (I never, ever, think of this as the "master bedroom" - why is that?  I'm bossy enough to be the master).


But my husband did the shelves!

And I got it photographed - only one week late for Leila's bedroom spiff-up (linked up with pretty happy funny real).

 
Used to be storage boxes with hats flopped on top.  They were hard to sort through, looking for belts, scarves, tights, and shoe polish.  Now it's easy and the hats even look artsy. 

I like to think each tiny project brings us closer to being done with the house; I'm not so naive to think we will ever have a perfect house, but I do think there's a baseline that we haven't reached yet.  Old houses have lots of projects!

Wednesday, November 14, 2012

Hot Cereal with a Surprise

Mr. Thrift went away on a weekend bike trip and came back raving about the oatmeal he ate.  My husband is not a big fan of hot cereal, so if he can't stop talking about a delicious hot cereal, I pay close attention.


The men started with a base of steel-cut oats in the crockpot (I just used my hot cereal).  Then they added:
1.  dried cranberries
2. walnuts
3.  a bit of brown sugar, and
4. (surprise!) goat cheese. 


This is how we replicated it at home and it was superb.  Usually I eat hot cereal somewhat dutifully. I think it's important to eat plain, simple food sometimes and not depend on our meals for entertainment; nourishment, yes, but entertainment only sometimes.

Later, Mr. Thrift reminded me that the men had added some chopped crystalized ginger, so we are definitely going to try that next time.

Tuesday, November 13, 2012

Pumpkin Bread Sandwiches - updated with recipe!

I made up this packed lunch idea out of my own head, not out of Pinterest, which sometimes seems remarkable these days.


I simply put cream cheese between 2 slices of pumpkin bread, wrap tidily in waxed paper, tuck in a plastic bag, and freeze.  Don't freeze bread in waxed paper alone as it would get too dried out.

When I pack a lunch in the morning, I just pull out a frozen waxed-paper wrapped sandwich and put it in the bag.  By lunchtime, it's nicely thawed.


My pumpkin bread recipe has whole wheat flour, raisins and nuts in it, but I usually fill out the lunch with crunchy vegetables, fruits, and protein.  Here are three menus for a child-sized lunch:

Menu 1:
pumpkin bread/cream cheese sandwich
roasted chickpeas
apple

Menu 2:
pumpkin bread/cream cheese sandwich
popcorn
carrot coins & celery sticks

Menu 3:
pumpkin bread/cream cheese sandwich
hard-boiled egg
pretzels
 
****updated with recipe (I don't mind at all posting it, but I didn't know if you wanted the recipe because there are a million out there! So please, anytime you want a recipe, just ask.  I don't believe in secret recipes.)
 
Pumpkin Bread - modified from Simply in Season
 
In a mixing bowl, mix together and make a well in the center:
1 cup whole wheat pastry flour
1 cup all-purpose flour
1 cup whole wheat flour
1 cup wheat germ or oat bran
1 cup white sugar
1 cup brown sugar
2 tsp. baking soda
1 1/2 tsp. salt
2 tsp. ground cinnamon
3/4 tsp. ground ginger
1/2 tsp. ground nutmeg
1/4 tsp. ground cloves
 
Separately, lightly beat 4 eggs.  Then add to the well in the flour mixture.
 
Also, to the well, add:
2 1/2 cups cooked, pureed winter squash such as butternut, liquid drained off
1/2 cup vegetable oil
3/4 cup chopped nuts
3/4 cup raisins
 
Use a large spoon to gently mix the liquids and flour mixture.  Mix together until just combined; a few streaks of flour is preferable to overmixed, tough bread!  Pour batter into 2 well-greased 9x5 loaf pans. 
Bake at 350 for 45-60 minutes.  At 45 minutes, stick a toothpick or cake tester in the very center of a loaf; it must come out clean for the loaves to be done baking.  Keep baking and checking in 5 minute increments until the tester is clean.  Quick breads must be perfectly baked to be good! 
 
Cool in the pan for 10 minutes when done baking.  Loosen the edges of the loaves with a knife, and then turn out onto wire racks to finish cooling.  Slice when cool. 
 
Serve with cheese, cream cheese, or apple butter.
 
A note about the flours in this recipe: 
I would keep the all-purpose flour at 1 cup, but you can use white whole wheat flour for the rest; or, if you don't have WW pastry flour, you can use half all-purpose and half regular WW flour.  If you don't have WW pastry flour, I highly recommend trying it; it's a great way to get whole grains in baked goods with the chemical leaveners (baking soda and baking powder) because it keeps a light texture.  Don't use WW pastry flour with yeast, however; white whole wheat flour is great for that.

Monday, November 12, 2012

The Cutest Little Needle Cases

I could have died from the cuteness when I made this little needle case.  Have you ever seen such a wee envelope, with such a cute mimic stamp and lines of address?  I mean, really.  Let's all squeal together!

 
And lo, the needle case is incredibly practical, too!  I have solved two annoying problems with these little needle cases.

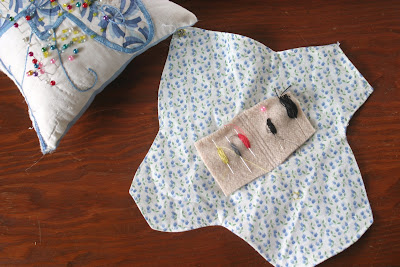
First, I had needles and thread mixing with my pins all over the pincushion Rebecca made me.


 I used to throw away those lengths of thread because they would tangle and I never seemed to have the right color cut already. But no more!  Now I have a little envelope tucked away in my top drawer, with all my needles in whatever thread I used last, ready for the next little handsewing job.  I think I have a new skylight in my mind!


Then there was the issue of my handsewing carried on the bus and elsewhere.  I had been putting my needle and thread and thimble in a little plastic saffron jar in my handwork bag, but it would get so tangled and I'm sure the plastic was blunting the needle tip.

So I made a traveling needle case.


First I made a little green pocket for the thimble.  Then I had a better idea (during church, I confess).  I took the turtle pocket off.  I made a second little envelope for the thimble, attached to the mother-ship case by a ribbon. 


Then I died all over again from the cuteness. 

Notes: 
1. The wool is felted sweater scraps from the creative re-use store.
2. I got the idea for this needle case on Pinterest, but when I followed the link, I needed to pay $9 for the pattern, so I eyeballed my own and changed some things up.
3.  The interior scenic fabric is from this nightgown.  I love the fabric so much.
4.  The other interior fabric, the blue rosebuds, is from Jean from church who gave me a bag of fabric and patterns.  I do love found fabric!
5.  I do not own a pinking shears.  I borrowed a pair from my mother-in-law to make the stamp.  The shears belonged to her grandmother.
6.  The blue chambray envelope exteriors are from a scrap of Ben's quilt backing.
7.  The green turtles came from a scrap of Rebecca's daughter's blouse; I also used it to make a pencil roll for a friend, only knowing that her favorite color was green, not that turtles were a sign of God's love after her mother's death.

So you see, these little needle cases carry the freight of many people's love and memories.  And the cases are cute! And they are practical!  I am so pleased.